
Anthurium Roots: Healthy Growth, Aerial Roots, and Warning Signs
When an Anthurium begins to look unhappy, its leaves often get all the attention. A yellowing lower leaf, soft petiole, or stalled new leaf may send a collector looking for fertilizer, higher humidity, or stronger light. Sometimes the real issue sits out of sight: the roots are struggling to take up water, receive enough oxygen, or recover from disturbance. At other times, perfectly healthy aerial roots growing above the pot are mistaken for a sign that something is wrong.
Healthy Anthurium roots are defined more reliably by firmness, function, and new growth than by being perfectly white. Many Anthuriums naturally produce roots along a short stem or above the potting medium. Those roots are part of the plant's normal growth habit. Concerning changes include roots that collapse when lightly handled, a sour-smelling root zone, persistently saturated media, or a damaged growing point. Leaf symptoms alone cannot prove a diagnosis.
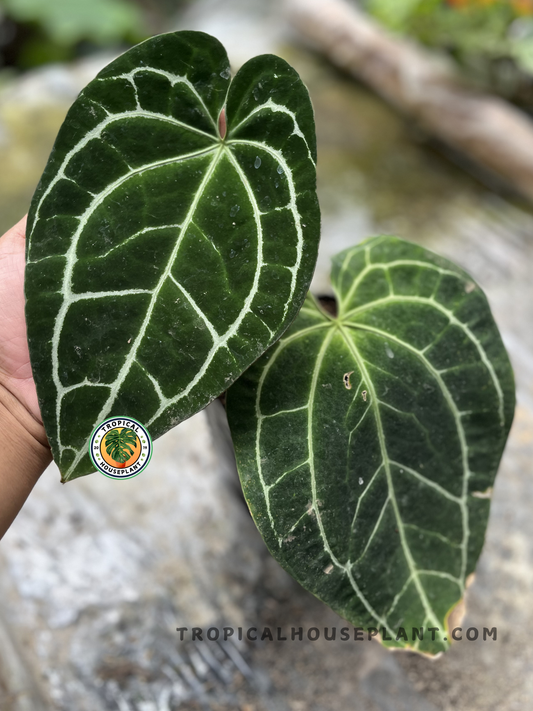
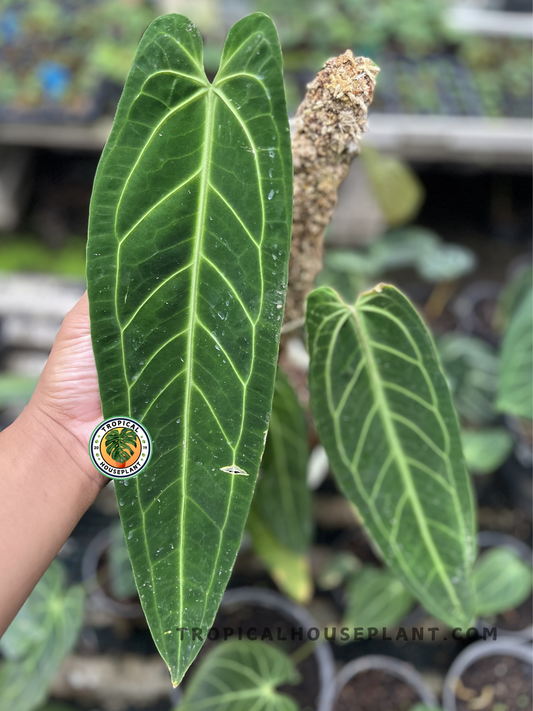
This guide explains how Anthurium root systems work, how to distinguish aerial roots from struggling underground roots, and when repotting or a careful recovery plan is justified. It covers mature foliage plants and recently imported specimens, with particular attention to the types sold as Anthurium crystallinum, A. warocqueanum, and related collector Anthuriums.
The quick root-health checklist
| What you observe | What it may mean | What to do first |
|---|---|---|
| Firm white, cream, tan, or naturally stained roots | Often normal, especially with active root tips | Keep watching growth and medium moisture |
| Roots growing above the container | Normal aerial-root development in many types | Leave intact; decide whether support or medium contact is needed |
| Soft roots that separate or collapse | Root tissue damage or decay | Check substrate moisture, oxygen, and remaining firm tissue |
| Wilting while medium remains saturated | Possibly impaired root function | Inspect root zone before adding water |
| Brown root exterior but firm interior | Color alone is inconclusive | Compare texture and new growth rather than trimming automatically |
| Roots circling a small pot | Could indicate a plant ready for more room | Assess growth, watering frequency, and substrate condition |
These are diagnostic clues rather than a substitute for identifying a specific disease. Multiple causes can produce similar above-ground symptoms. North Carolina State University Extension notes that aerial roots may occur in Anthurium and that excessive watering can contribute to root rot, supporting the importance of examining root conditions rather than diagnosing from leaf color alone.
What Anthurium roots actually do
Roots anchor the plant, absorb water and dissolved nutrients, and interact with the surrounding growing medium. They also respire: living root cells need oxygen to function. A mix can be wet and still become a poor root environment if its air spaces are filled for too long. This is why watering more frequently is not automatically the solution when leaves look limp.
Many members of the genus grow in tropical environments where organic debris, moss, bark, and other relatively open materials surround the roots. Some species are terrestrial, some epiphytic, and others may behave as hemiepiphytes or occupy intermediate habitats. Those terms describe growth strategies, not a universal instruction to remove all moisture-retentive components from every container. The important principle is that a potting environment should retain appropriate moisture while allowing oxygen to reach active roots.
Young roots and root tips are important for ongoing uptake and exploration. As roots age they may change color, thicken, or develop tougher outer tissue. It is perfectly possible for a vigorous plant to have tan or brown outer roots and bright new tips elsewhere in the pot. A useful assessment considers the system as a whole rather than selecting one unattractive-looking root for judgment.
Why Anthuriums make aerial roots
An aerial root develops from a stem or node above the main growing medium. It may extend outward, cling to surrounding material, or grow downward until it finds contact with moss or substrate. Depending on species and conditions, it can help anchor the plant and may absorb water when it encounters a suitable moist surface. Aerial roots are not usually a sign that the plant is desperately trying to escape a toxic pot.
As an Anthurium matures, its stem may rise and expose sections that previously sat close to the substrate surface. Roots developing along that stem can become visible. Some foliage Anthuriums show conspicuous roots around the base while the leaves remain healthy. This is normal growth architecture. You do not need to bury the entire elevated stem each time another root emerges.
North Carolina State University Extension explicitly lists aerial roots among the identification traits of Anthurium. Treating every visible aerial root as evidence of rot would therefore confuse normal development with a problem. What matters is whether the main root system remains functional and whether the plant is supported as it becomes taller or heavier.
Should you put aerial roots into the pot?
Usually there is no urgency. If a healthy aerial root naturally reaches the medium, you can guide it gently toward a suitable surface without sharply bending or snapping it. If an aerial root grows away from the container, leaving it alone is often harmless. For tall plants, a small collar of appropriately moist moss or a stable support may provide contact that the plant can use, but the moss should not be kept constantly soaked against the stem.
A root that has spent time growing in air may respond differently when suddenly buried in dense, wet material. Avoid packing potting mix tightly around exposed stem tissue just to hide the root. In particular, do not bury the crown or active growing point. A plant can suffer if the central stem region remains continuously wet and poorly ventilated.
If an aerial root has dried at its tip, that does not necessarily indicate failure of the underground root system. Assess the rest of the plant. Regular misting is not mandatory, and spraying visible roots several times a day can create wet foliage and surfaces without fixing problems deeper in the container.
Healthy roots are not always white
Newly formed roots may appear pale, cream, or pinkish depending on the plant. Older roots can be tan, brown, or stained by bark and other medium components. Translucent outer layers and naturally corky textures also differ across species and ages. A single color chart cannot reliably classify all roots as alive or dead.
Instead, check whether tissue is reasonably firm, whether roots remain attached without sliding apart, and whether the plant is creating new root tips. A healthy root may flex without turning to pulp. Some older sections can be less attractive but still structurally useful. Cut away tissue only when it is clearly dead, collapsed, or decaying. Excessive pruning based on a dark color alone can remove more functioning roots than the problem originally damaged.
For a cautious inspection, moisten a compacted root ball just enough to loosen it, then use your fingers to separate small portions gently. Avoid scraping or squeezing every root. The purpose is to gather evidence, not conduct an exhaustive examination that creates fresh injury throughout the system.
How to recognize potentially damaged roots
Concerning roots may feel soft, gelatinous, hollow, or easily detached. In some cases the outer tissue slides away from an inner strand. A persistently sour smell from saturated medium can strengthen concern, especially when combined with wilting and deterioration. These clues suggest poor root-zone conditions or decay but do not, on their own, identify a particular pathogen.
Not every broken root is rotten. A root can snap during a move or transplant and remain otherwise healthy. Likewise, an older root may look dark because of organic staining. Check a small sample, then stop handling the system once you know enough to decide whether intervention is needed.
Root problems can arise from prolonged waterlogging, low oxygen, cold conditions, physical injury, or organisms taking advantage of stressed tissue. Fertilizer salt accumulation can also damage sensitive roots. The correct response begins with the likely environmental cause rather than assuming every blackened tip requires the same treatment.
Why the leaves can mislead you
Yellow leaves may appear with excessive moisture, drought, inadequate light, nutrient imbalance, natural aging, or root disturbance. A drooping leaf can mean the roots have too little accessible water, but it can also mean they are unable to absorb water because they are damaged. These two situations can look similar from above. Watering immediately whenever you see drooping may therefore worsen a waterlogged root system.
Compare the entire plant over several days. Are multiple leaves becoming soft? Is the newest growth stalled? Is the medium still saturated when the plant is visibly wilted? Is the stem base firm? Is there a recent change in temperature or light? A single aging lower leaf alongside vigorous new growth may deserve observation, not emergency surgery.
Photograph the plant in consistent light and note watering dates. Small records are often more useful than repeated changes in fertilizer, humidifier settings, and substrate. Plant care becomes easier when you can distinguish a recurring trend from one symptom that happened after a stressful day.
How moisture and oxygen work together
A porous medium contains spaces that can hold water and air. Immediately after watering, more of those spaces are wet. As excess water drains and the plant takes up moisture, air can return. In a very fine or compacted medium, drainage may be slow and oxygen availability may remain low. This is one reason a plant in a large, heavy container can stay wet much longer than the small root system needs.
Frequent watering is not inherently harmful when the medium drains freely, the plant uses moisture actively, and enough oxygen is available. The problem is persistently poor aeration. Conversely, a coarse medium in a warm and airy space might dry much sooner than anticipated. The right practice is to observe the actual combination of substrate, roots, pot size, and environment rather than apply a rigid seven-day watering rule.
Ask Extension horticultural guidance explains that excessive water can suffocate Anthurium roots and favor root rot. This physiological connection matters more than choosing a particular brand of bark or following a universal moisture percentage.
Choose a potting mix for root function
Foliage Anthuriums often benefit from an open-textured medium containing appropriately sized particles. Orchid bark, coarse mineral components such as pumice or perlite, and moisture-holding materials can be combined in different proportions to suit the plant and growing space. You do not need one exact recipe for every species or climate.
Look for three practical properties: the medium takes up water when irrigated, unwanted excess drains away, and the root zone does not stay dense and airless. A mix composed entirely of large, dry bark pieces may be difficult to wet consistently in a small pot. A mix composed entirely of fine, water-retentive material may be slow to drain in a cool room. A balanced combination is easier to manage.
Consider local conditions. Warm greenhouse shelves with good airflow can dry much faster than indoor window corners with air-conditioning. Plants growing under a humid enclosure may use water at a different rate from those in open ambient air. Adjust substrate and watering together; changing only one factor can create an unexpected problem.
Does every Anthurium need a transparent pot?
Clear nursery pots are a useful learning tool because you can watch roots reach the container wall and see how moisture moves through the medium. They are optional rather than essential. A healthy Anthurium in an opaque pot is not missing a critical ingredient.
When using a transparent container, choose one with drainage and avoid placing delicate exposed roots against a surface that overheats in direct sunlight. Roots visible through the wall do not prove the entire root ball is healthy, but they can help you monitor development without pulling the plant apart. A clear pot inside a decorative cachepot can be convenient if excess water is removed promptly.
Choose container shape based on the plant's size and root pattern. A slender root system may appreciate a different pot depth from a shallow, wide system. What matters most is the fit between functioning roots, drainage, and the amount of medium that must dry after watering.
When roots at the drainage holes mean repotting
One root emerging from a drainage hole is not automatically an emergency. A healthy plant may explore any available space. Look at the broader pattern: does the pot dry very quickly despite thorough watering? Has root growth crowded out much of the medium? Does the plant lean because the container is unstable? Has growth slowed while other care remains appropriate?
If several signs point to a crowded root system, a modestly larger pot may help. Choose an increase that gives room for new growth without surrounding the root ball with a large volume of unused wet medium. If the plant is thriving, there is no need to repot solely because you have spotted an impressive white root at the bottom.
Time repotting when the plant is reasonably vigorous if possible. Avoid stacking multiple stressors such as cold transport, major root pruning, new fertilizer, and a much larger pot in one week. A single planned transition is easier to manage and diagnose than several simultaneous changes.
How to inspect roots without unnecessary damage
First decide whether an inspection is truly needed. If a plant has firm leaves, good growth, normal drainage, and a stable watering pattern, disturbing the entire root ball provides little benefit. Inspection becomes more useful when the plant is declining, the medium has soured, roots are collapsing, or a recent shipment has left the base loose or unstable.
- Prepare a clean area. Gather a container, clean scissors, a fresh medium option, and a camera or notes.
- Remove the nursery pot gently. Support the crown and squeeze flexible container walls instead of pulling hard on petioles.
- Look at the overall pattern. Note how much live root tissue is present and whether waterlogged pockets occur in the center.
- Check texture selectively. Examine one or two questionable roots without stripping the entire system.
- Assess the stem base. Confirm the crown and lower stem remain firm and not buried in decomposing material.
- Make the smallest useful correction. A plant in a suitable mix may need only a careful return to its pot.
- Record findings. Note any confirmed decay, medium change, or root loss so later symptoms have context.
Large, fleshy roots can crack when bent abruptly. Use enough time and moisture to loosen old fibers, but avoid prolonged soaking of a plant already showing decay. A slow inspection is more effective than repeatedly rinsing and handling the same damaged roots.
What to do if you find root rot
If there is unmistakably soft, collapsing tissue, remove the plant from the conditions that caused or worsened the problem. Clean tools before making cuts, trim clearly dead sections, and keep as many firm functional roots as possible. Replace heavily decomposed or persistently saturated growing medium with a more suitable, aerated option. Use a container proportionate to the surviving roots, not the plant's former pot size.
Inspect the stem base carefully. If rot has progressed into the crown or critical growing tissue, prognosis is more guarded than when only a few peripheral roots have failed. For a plant that still has an intact healthy stem and viable growth point, careful recovery may be possible. Avoid making confident promises when most of the root system is gone.
Do not automatically respond with concentrated fertilizer or an assortment of unverified treatments. Root cells under stress need favorable water and oxygen conditions; stronger fertilizer may add another challenge. Where a specific pathogen is suspected, accurate diagnosis matters because different causes demand different measures.
Recovery care after root loss
A plant with fewer roots cannot replace water lost through the leaves as easily as before. Place it in stable warmth and bright indirect light, away from strong sun and hot or cold drafts. Moderate humidity can reduce water loss, but the root zone still needs air. A sealed, constantly wet enclosure can create a new problem, especially if leaves and stems remain pressed against condensation.
Water the reduced root system according to the smaller amount of medium and the plant's actual uptake. A freshly repotted plant may not consume moisture at its old pace. Rather than trying to force fast growth, watch for stabilization: stem firmness, leaves that stop deteriorating, and eventually new root tips or a growing leaf.
A gradual recovery can include losing one older leaf while the plant prioritizes survival. Monitor the direction of change. If the stem becomes softer and new roots continue to decay, the plant needs reassessment; if the base remains firm and fresh root tips develop, avoid disturbing it again simply because recovery looks slow.
Special care for newly imported Anthuriums
International transport can expose roots to packing pressure, changing temperatures, reduced light, and extended periods outside their familiar growing environment. A plant that arrived with cleaned roots may not immediately behave like a settled plant that has been growing in its pot for months. Distinguish shipping stress from active decay before pruning away tissue that might still function.
Unpack carefully, inspect the root zone and crown, then place the plant in a modest container with a suitable airy medium. Gentle handling matters because tender new root tips can be damaged during repeated unpacking and repotting. Keep the plant separate from the main collection while watching for pests. Allow its new environment to remain consistent long enough for root recovery.
For the wider arrival process, read TropicalHouseplant's guide to acclimating imported tropical houseplants. That article addresses post-shipping care broadly. Here the focus is narrower: observing root condition, managing aerial roots, and deciding whether a root problem actually needs intervention.
Why humidity is not a cure for root problems
Humidity affects how quickly water evaporates from leaves, while root-zone conditions determine how effectively water can be taken up and transported. Those processes are related but not interchangeable. Raising ambient humidity may reduce stress for a plant with a compromised root system, but it cannot restore oxygen to an airless pot or revive dead tissue.
In a closed cabinet or propagation box, check that foliage dries at intervals and there is some air exchange. Consistently wet leaf surfaces and stagnant conditions may encourage other problems. Conversely, powerful air movement that dries the medium rapidly may be too much for a newly imported root system. Aim for a stable balance rather than the highest possible humidity reading.
If roots are healthy and the plant grows well at normal home humidity, there is little reason to make the setup complex. Aerial roots can remain exposed in those conditions. A plant is not automatically dehydrated because an aerial root does not look freshly wet.
How fertilizer affects Anthurium roots
Fertilizer supplies nutrients but does not substitute for an effective root system. If the medium is chronically wet or the roots are badly damaged, more fertilizer may increase dissolved salt levels without solving the underlying problem. Root tips can be sensitive to concentrated solutions, especially when the plant is taking up water slowly.
Feed established, actively growing plants conservatively according to the fertilizer directions and the conditions in which they are grown. If a plant has just lost substantial root mass, first stabilize the environment and allow new growth to begin. Avoid mixing multiple strong supplements without knowing their combined concentration.
When leaf margins brown, consider several possibilities: water quality, concentrated salts, dehydration, high light, physical damage, and root dysfunction. The symptom does not uniquely identify a fertilizer deficiency. Observing a complete root-and-environment picture prevents treating the wrong cause.
Different Anthuriums, different growth habits
A compact florist Anthurium, a bird's-nest type such as A. hookeri, and an elongated velvet-leaf type such as A. warocqueanum can differ in stem structure, foliage size, and root behavior. It is normal for some types to show more obvious aerial roots or elevated stem sections than others. Do not copy a moss collar, container height, or watering schedule from a different type without checking how your own plant grows.
Velvet foliage itself is not a root diagnosis. A species known for dramatic leaves may simply be more conspicuous when it droops. Another type with thick foliage may hide stress longer. Observations of the root system, stem base, and growing conditions are more transferable across types than guesses based on leaf texture alone.
Consult the plant's scientific name whenever possible. Trade labels sometimes use broad names for multiple related forms. Accurate identification is especially helpful if you seek more specialized care recommendations for climbing, bird's-nest, or terrestrial-growing Anthuriums.
Preventing recurring root trouble
The simplest prevention plan is consistent rather than elaborate. Use a suitable container with working drainage, choose a medium whose moisture behavior you understand, and place the plant where light and temperature are stable. Check moisture deeper than the uppermost bark pieces when possible. Empty standing water from decorative outer pots. Inspect the crown periodically so accumulating debris and old sheath tissue are not constantly wet.
A brief monthly record can reveal changes before they become serious: time between waterings, appearance of new leaves, condition of roots visible near the pot wall, and whether the plant remains stable in its container. Avoid repotting healthy specimens repeatedly just to check progress. If you do change the potting mix, give the plant time to respond before making another major adjustment.
Finally, distinguish maintenance from rescue. An aerial root reaching outward is often a reason to observe the plant's natural development. A rapidly softening stem base and sour substrate are reasons to investigate. Treating both situations with the same aggressive repotting would create needless stress.
Frequently asked questions
Should Anthurium aerial roots be covered with moss?
Not necessarily. Many aerial roots can remain exposed without harming the plant. Moss contact may be useful for some growth habits, but it should be loose and managed so the stem does not remain persistently wet. Avoid burying the crown or forcing stiff roots into a tight position.
Are brown Anthurium roots dead?
Color alone is insufficient. Roots can darken naturally or become stained by the medium. Check texture, attachment, firmness, new tips, and the health of the plant as a whole. Soft tissue that collapses is more concerning than a firm tan root.
Why is my Anthurium drooping even though the pot is wet?
Wet medium does not guarantee effective water uptake. A root system deprived of oxygen or affected by decay may struggle to absorb water. Inspect drainage and the condition of the roots before adding more water, while also checking for temperature and recent shipping stress.
Can Anthurium root rot spread to the stem?
Severe tissue decay can affect the base of the plant, including important stem regions. A firm crown and remaining healthy roots are encouraging signs; a softening, collapsing growing point is more serious. Remove clearly dead tissue and correct the environment, but avoid assuming every discolored surface indicates spreading infection.
Should I cut off aerial roots?
Generally leave healthy aerial roots intact. They are a normal part of growth for many Anthuriums and can help with anchorage or moisture contact. Pruning them solely for appearance removes potentially useful tissue and creates unnecessary wounds.
How do I know when to repot an Anthurium?
Repot when root crowding, unstable container size, failing substrate, or an actual root problem makes a change beneficial. One visible root at a drainage hole is not enough by itself. When possible, repot while the plant is actively growing and use only a modestly larger container.
Do clear pots prevent root rot?
No. Clear pots make roots and moisture easier to see but do not replace drainage, proper substrate, and suitable watering. An opaque pot with well-managed root conditions can work just as well.
Can an Anthurium recover after losing many roots?
Recovery may be possible if the crown and growing point remain viable, but it depends on how much healthy tissue is left and whether favorable conditions can be maintained. Do not expect instant leaf production. Look for stem stability and new root formation over time.
Read the roots before changing everything else
Anthurium care becomes more predictable when aerial roots are understood as normal growth and underground roots are evaluated by their structure and function. A firm, developing root system can be pale, tan, or naturally stained. A root zone that stays saturated, smells sour, or contains collapsing tissue deserves attention. The best response is usually targeted: improve oxygen and moisture balance, preserve healthy roots, and avoid repeated interventions.
To explore examples of foliage forms and growth habits, browse the Anthurium collection at TropicalHouseplant. Botanical differences are worth appreciating, but every plant benefits from the same careful first question: are its roots able to do their job?
Sources and further reading: North Carolina State University Extension — Anthurium (aerial roots and risk of root rot); Ask Extension — Anthurium watering and root function; TropicalHouseplant — Acclimating Imported Plants. Care practices described here are general horticultural guidance and do not identify a pathogen or guarantee a result for a specific specimen.
